Growing Potatoes in Your Florida Backyard: A Step-by-Step Guide
If you’re dreaming of harvesting your own spuds right from your Florida backyard, you’re in for a treat! While Florida’s warm climate and sandy soils can make growing potatoes a bit tricky, it’s totally doable with the right know-how. Potatoes love cooler temps and fertile soil, so with some planning, you can enjoy a bountiful harvest. Here’s everything you need to know to grow potatoes in the Sunshine State, from planting to plate.
When to Plant Potatoes in Florida
Timing is everything when growing potatoes in Florida, as they thrive in cooler weather. Florida’s regions have slightly different planting windows to dodge the summer heat:
North Florida: Plant from mid-January to early March.
Central Florida: The season typically runs from early January to late February.
South Florida: Get planting from late November to early February.
These schedules help your potatoes grow before temperatures climb above 85°F, which can stress plants and shrink your harvest. Keep an eye out for rare frosts in North Florida—cover your plants if a cold snap hits!
Picking the Right Potato Varieties
Selecting varieties that can withstand Florida’s warm climate is crucial. Here are some top picks:
Red Pontiac: A red-skinned favorite with good heat tolerance.
Yukon Gold: Creamy, yellow-fleshed potatoes that do well in warmer areas.
LaChipper: A white-skinned variety bred for Florida’s conditions.
Sebago: Another white potato that adapts to local soils.
Fingerlings: Small, flavorful tubers that work for shorter seasons.
Always buy certified disease-free seed potatoes from a garden center or supplier. Skip grocery store potatoes—they might be treated to stop sprouting or carry diseases.
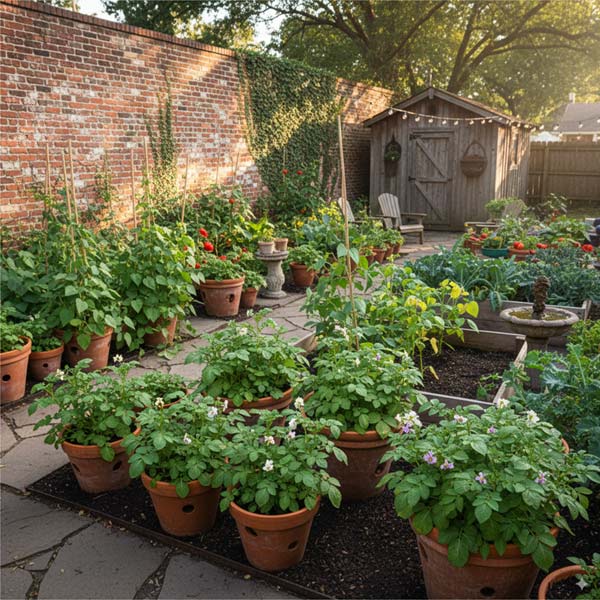
Setting Up Your Garden
Choosing a Spot
Find a sunny corner of your backyard that gets 6–8 hours of direct sunlight daily. Potatoes need full sun to produce those tasty tubers.
Prepping the Soil
Florida’s sandy soils need a little love to grow great potatoes. Aim for a slightly acidic soil pH of 5.5–6.5. Here’s how to get your soil ready:
Test Your Soil: Grab a soil test kit or contact your local county extension service to check pH and nutrient levels.
Boost Fertility: Mix in 4–6 inches of compost, aged manure, or peat moss to a depth of 8–12 inches. This improves water retention and nutrients.
Fertilize: About a week before planting, add a balanced fertilizer like 10-10-10. Avoid high-nitrogen blends, as they make plants leafy instead of tuber-heavy.
Consider Raised Beds or Containers: If your soil is too sandy or soggy, try raised beds or large containers (15–20 gallons) filled with a mix of compost, topsoil, and sand.
Planting Your Potatoes
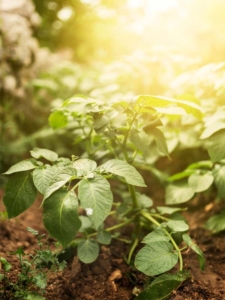
Image by Freepik
Cut seed potatoes into 1.5–2-inch chunks, making sure each piece has 1–2 “eyes” (sprouts). Let them dry for a day or two to form a callus, which helps prevent rot.
Want a head start? Pre-sprout your potatoes by placing them in a cool, bright spot for 2–3 weeks until sprouts are about ½ inch long.
Dig trenches or holes 6–8 inches deep, with rows 2–3 feet apart.
Place seed potato pieces cut-side down, eyes up, spacing them 10–12 inches apart. Cover with 3–4 inches of soil.
As plants grow to 6–8 inches tall, “hill” them by mounding soil, straw, or compost around the stems, leaving the top leaves exposed. This encourages more tubers and keeps them from turning green (which makes them toxic).
Caring for Your Potato Plants
Keep the soil consistently moist but not waterlogged—aim for 1–2 inches of water per week, especially when tubers form (6–10 weeks after planting). Use drip irrigation or soaker hoses to avoid wetting the leaves, which can invite fungal diseases in Florida’s humid climate.
Every 2–3 weeks, add more soil or mulch around the base of the plants to keep tubers covered and cool.
About 4–6 weeks after planting, side-dress with a low-nitrogen fertilizer (like 5-10-10) to support tuber growth. Don’t overdo it—too much fertilizer can hurt tuber quality.
Managing Pests and Diseases
Florida’s warm, humid conditions can attract pests and diseases:
Pests: Watch for potato beetles, aphids, or wireworms. Hand-pick beetles, try neem oil for aphids, or use organic insecticides like Bt for bigger infestations.
Diseases: Fungal issues like early or late blight thrive in humidity. Choose resistant varieties, space plants for air flow, and avoid overhead watering.
Nematodes: Root-knot nematodes are common in Florida. Rotate crops yearly and plant marigolds nearby to help deter them.
Harvesting Your Potatoes
New Potatoes: Dig up small, tender potatoes 60–90 days after planting, usually when plants start to flower (if they do).
Mature Potatoes: Harvest 90–120 days after planting, when the foliage yellows and dies back (typically March to May, depending on your region).
How to Harvest: Use a garden fork or shovel, starting 12–18 inches from the stem to avoid spearing tubers. Expect about 5–10 pounds of potatoes per 10 feet of row.
Storing Your Harvest
Curing: Let potatoes sit in a cool (50–60°F), dark, well-ventilated spot for 1–2 weeks to toughen their skins.
Storage: Store in a dark, cool (40–50°F), humid place in breathable containers like burlap sacks. Check regularly for sprouts or rot. Properly stored, they can last 1–3 months.
Florida-Specific Tips
Beat the Heat: Choose early-maturing varieties (90–100 days) to finish before summer heat.
Crop Rotation: Rotate with crops like beans or corn each year to prevent soil-borne pests and diseases.
Mulch: Use straw or pine needles to keep soil cool and reduce weeds.
Short on space? Grow potatoes in pots, grow bags, or even stacked tires with good drainage.
Stick to winter planting to avoid Florida’s rainy season (May–October), which can cause rot.
For more information, check out the University of Florida IFAS Extension.

